Showing posts with label cute. Show all posts

Sunday, 3 March 2013

Birthday party in a Bento Box


Remember when I got all excited about bento boxes? This is my first attempt. Not very healthy but I love how cute the little treats look all next to each other in the box.

The nesting boxes are for sale in Paperchase at the moment, you get four in total so you can play around with different sizes. This bento box is meant for a friend's birthday, so I included a teeny birthday cake, a little bird's nest, a chocolate covered strawberry and some marzipan treats.


The marzipan sweets were made simply by adding food colouring to separate lumps of marzipan, then rolling out four equal sized sauages and pushing them together to form a long block, which you then cut into cubes with a sharp knife. You can roll them in a bit of icing sugar to stop them sweating, then I used chocolate writing icing to draw little kawaii faces.


I got a Bento recipe book recently so I'll definitely be making up some more bento boxes. I can't wait to try some healthier recipes and making up some fun lunches for work. :-)

Monday, 25 February 2013

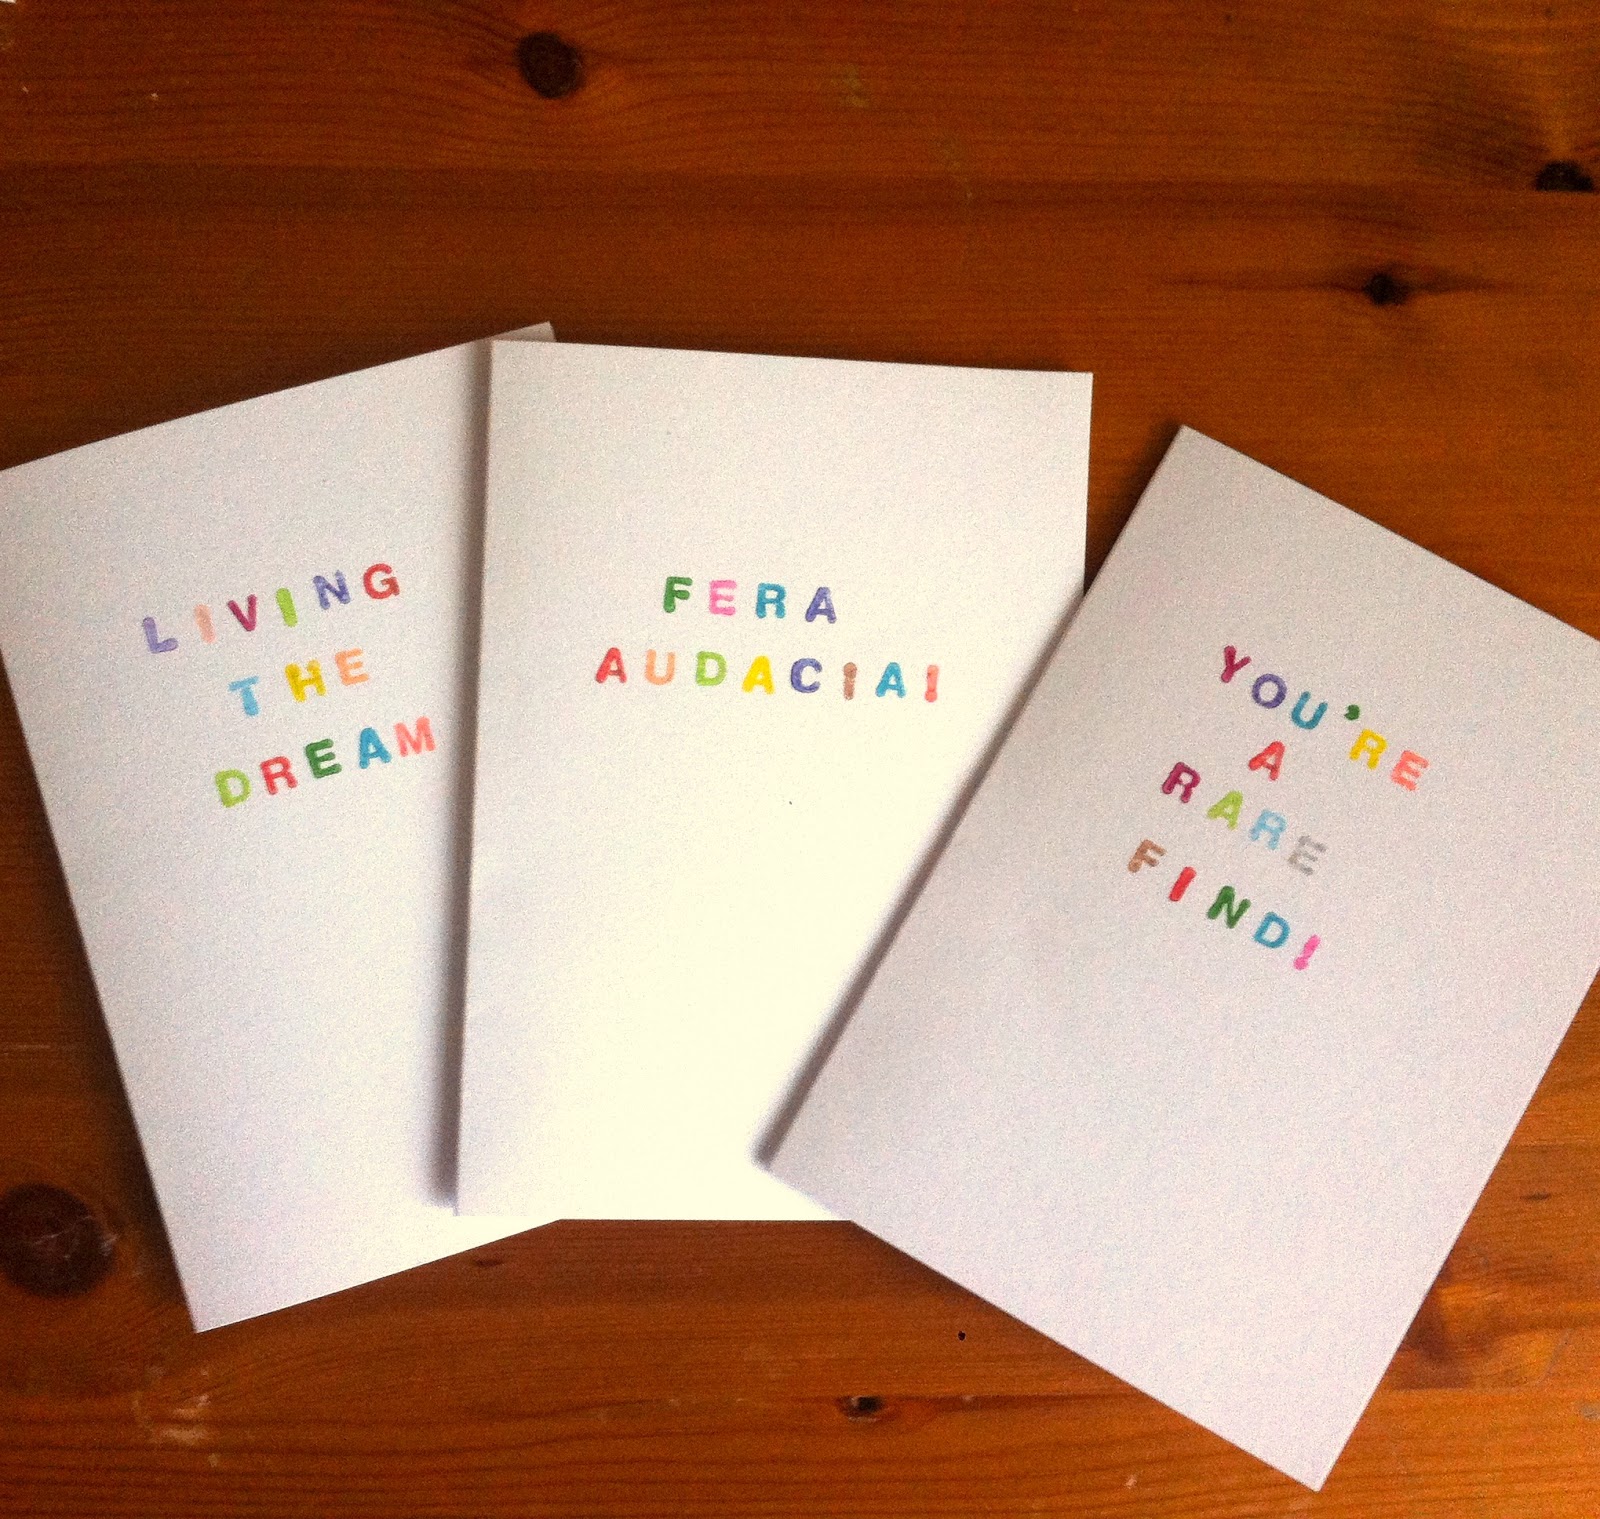
Greetings cards in a hurry - rubber alphabet stamps


I often find myself putting together greetings cards in a rush (Sorry, friends and loved ones). The following post shows an idea for a personal greetings card that is laughably simple and requires little to no artistic flair whatsoever - if you're intimidated by drawing or printmaking then this is for you. The end result is quirky, witty and really simple, but in so many cases the simplest ideas can be the most striking and effective.


Materials:

Rubber alphabet stamps (mine are from Muji)
Ink pad (Hobbycraft)
Blank cards
Baby wipes/damp tissue


The little extra something comes in the form of a multi coloured ink pad - I got this one at Hobbycraft. When I saw it I was immediately tempted by it, as I can never really be bothered with lots of different coloured pads, a bit too faffy for my liking. This is perfect and there is a nice little range of colours. The alphabet stamps were a present from friends several years back, but you can see they came from Muji and are still available in their shops now.


TIP - buy a pair of cheap baby wipes and have one to hand to blot each stamp after you use it. This stops your colours from getting messed up. I got mine in Wilkinsons for under £1. Bless you Wilkinsons, saviour to cheapskate crafters everywhere!

The real beauty in this method of card making is that the creativity and genius lies not in the technique, but the words you choose to put on the card. As well as the obvious 'Happy Birthday' etc, you can put someone's favourite quote from a film, a joke, a poem, a personalised greeting... the list goes on. All the cards you see here are completely personal to the people receiving them. These are cards for three special girlfriends who made my recent stay in London fantastic from start to finish. They're already through the postal system by the time this blog post goes out, so the surprise hasn't been ruined. ;-)

I really like the personal touch, the splash of colour and the classy minimalism of these cards. The materials are easy to get hold of, will last for ages and can be used in so many different ways. This is also ideal for a craft group of any age. I think blokes would like this style of card too, what do you think?


Monday, 4 February 2013

Mini Puppet Theatre Craft


As this blog goes along you’ll see I love all things miniature. I first made a mini puppet theatre for my friend back at university – the great thing about being on an arts course is you can make your friends bizarre presents like this for their birthday and they don’t mind.

This craft is great to do with a child as it’s fairly easy, they can throw a lot of their personality into it and make it their own. In fact, this craft is basic, the nuts and bolts are shown here but the final design will be very much down to you and your ideas. If you run a craft group or youth group, it’s also ideal, as the necessary materials aren’t hard to get hold of. 


You’ll need:
A smallish cardboard box
Scrap cardboard
Scissors/craft knife
Glue
Cutting mat
Paints
Paintbrushes
Lollipop sticks for puppets

First, you need to cut a hole in the front of your theatre for the stage area. I found it easiest to work the cardboard box apart so it’s flat, and draw a square with a ruler. Cut out the hole with a craft knife or scissors. 


Glue the box back together, and use masking tape to tape shut any flaps. The bottom of the theatre needs to be open for you to use your puppets, so cut these flaps off, or tape them inside the box to make the theatre more sturdy. If you want, cut out curtains from a piece of painted card, or fabric, and glue these behind the stage, making sure they don’t crowd the space for the puppets.


If you’re feeling adventurous you can use scrap pieces of cardboard to give your theatre more structure. I cut castle battlements and a house shape for my theatres. The possibilities are endless – a rocket, a tower, an opera-house… or why not theme your theatre around a favourite film or TV show? Perhaps make puppets of your friends or family? Next time I do this I’m making a Tardis theatre with little Doctor Who puppets… 


Next, paint your theatre. I used my trusty Plasti-kote craft paint, but acrylics or poster paint will work just as well. Again, this part is up to you and your imagination. If you’re stuck for inspiration, bright colours and simple patterns work well, or you could go for a Punch and Judy stripy effect.


I’ve painted lollipop sticks for my puppets, but feel free to go one step further – you could make cardboard or fabric puppets and stick them on the lollipop sticks for a more 3-d effect. Or maybe you could cut pictures of people out of magazines and mount them on some card.


That’s all there is to it really. Enjoy!

Sunday, 20 January 2013

A going-away gift


I first made a going-away package for my friend Imogen when she went traveling a few years back. This year my childhood friend Charlotte is moving abroad to start a new job, so I’ve put one together for her. Below is a guide to making your own for anyone you know going off an adventure.

Firstly, you’ll need an empty box of some kind. Personally I think a shoebox or similar is a bit too big, as the whole idea is the gifts are compact. Part of the fun lies in finding small gifts to include, and the recipient probably won’t have a lot of room to pack a large collection of presents. The box I’ve used is an empty Ferrero Rocher box (mmmm), it’s an ideal size, and I like the aesthetic of the gifts behind the transparent plastic.

Now the fun bit: tracking down some cute little presents to include. Charlotte loves making a house into a home, so I’ve included some little homey bits for her new apartment: little fridge magnets, a photo frame, a teabag holder. Think about the personal situation of the friend, to help you find appropriate gifts. Where are they going? Is it for pleasure, a new job, a new relationship? Are they likely to be homesick? What will they be doing? An example: if your friend is hiking, you could get some new shoelaces, a little compass, or an energy bar.


Aim for a mixture of useful gifts and some frivolous humourous ones. I’ve used labels to make the gifts a bit more special and raise a smile (Suki’s Box of Labels). The Eric Carle strawberry badge is an in-joke: we used to have a giant strawberry cushion in our old flat. The linen heart was a great find, now Charlotte can have a little piece of the UK hanging up on her wall.


To encourage her to keep in touch (and because she loves stationary and will be working in an office) I’ve packed up this cute letter set, and some sticky notes and stickers. These are great because they are lightweight and pretty, perfect for Charlotte to stow in her case. All these came from Artbox.


I just love the look of all the little presents nestled in the box!

I rubber stamped a large sticker for the top of the box and finished it off with pink ribbon. This is a really unique way to send your friend away smiling. To turn the concept on its head, this could also be a great goodbye gift for a friend or relative if YOU are going away – a Don’t Forget Me box, perhaps!


Finished!

Some other ideas for traveling/farewell gifts: 
  • Small pieces of jewellery
  • Keyring
  • Handwarmers/socks/cute tissues
  • Non-perishable food: energy bar, sweets/candy
  • Little notebook/pen
  • Small toiletry items: chapstick, hand cream, toothpaste etc.
  • A photograph of a favourite local haunt, pet or friends
 Have a go!