Showing posts with label DIY. Show all posts

Tuesday, 2 September 2014

Upcycled paper - Make your own scrapbook


Make your own little book containing lots of different types of paper in this easy project.


You will need:

  • Scraps of paper (old maps, pages from old books, lined or squared paper, tracing paper, magazine pages)
  • Long-armed stapler
  • Card for outside cover


  • Once you have your pages all arranged, fold them in half and attach them using a long-armed stapler. I used a plain piece of card for the outside cover which I then decorated using a paper-cut style decoration, but you could also use stamps, stickers or pens to customise it, or personalise it for the intended recipient if it is a gift. :)


    Write, draw, or stick stuff in it. It's up to you!

    Tuesday, 26 August 2014

    Upcycled canvas


    I really am a dummy - I had a series of step by step photos showing how I upcycled this canvas into a piece of patchwork art for my bedroom, and somehow I seem to have deleted all the photographs except the ones showing the finished article! 


    It's not like they are essential for showing you how its done, but it does mean you don't get to see how truly hideous this canvas was previously. My friends gave it to me straight from their man cave - it had a painting of a snake-like woman on it on profile, with a weirdly contorted body and massive boobs. One of those mass-produced things you can get in Ikea etc. Gross!

    They charged me with doing something else with it, so I decided to create a collage made up of fabric, photographs, drawings and found items. It was a very organic process and I just added to it and made it up as I went. If you want to attempt something like this you just need the following:


    • Old/horrible canvas you no longer want (You can just use a wooden frame too of course)
    • Upholstery staple gun
    • Scraps of fabric
    • Pictures/photos
    • Glue
    • Any embellishments you want (broken jewellery, buttons, badges etc).

    This makes a great project to do alone or in a group. It's fairly budget friendly, and you can theme the canvas, or make it match whatever wall you hang it on. Easy-peasy :)

    Monday, 25 February 2013

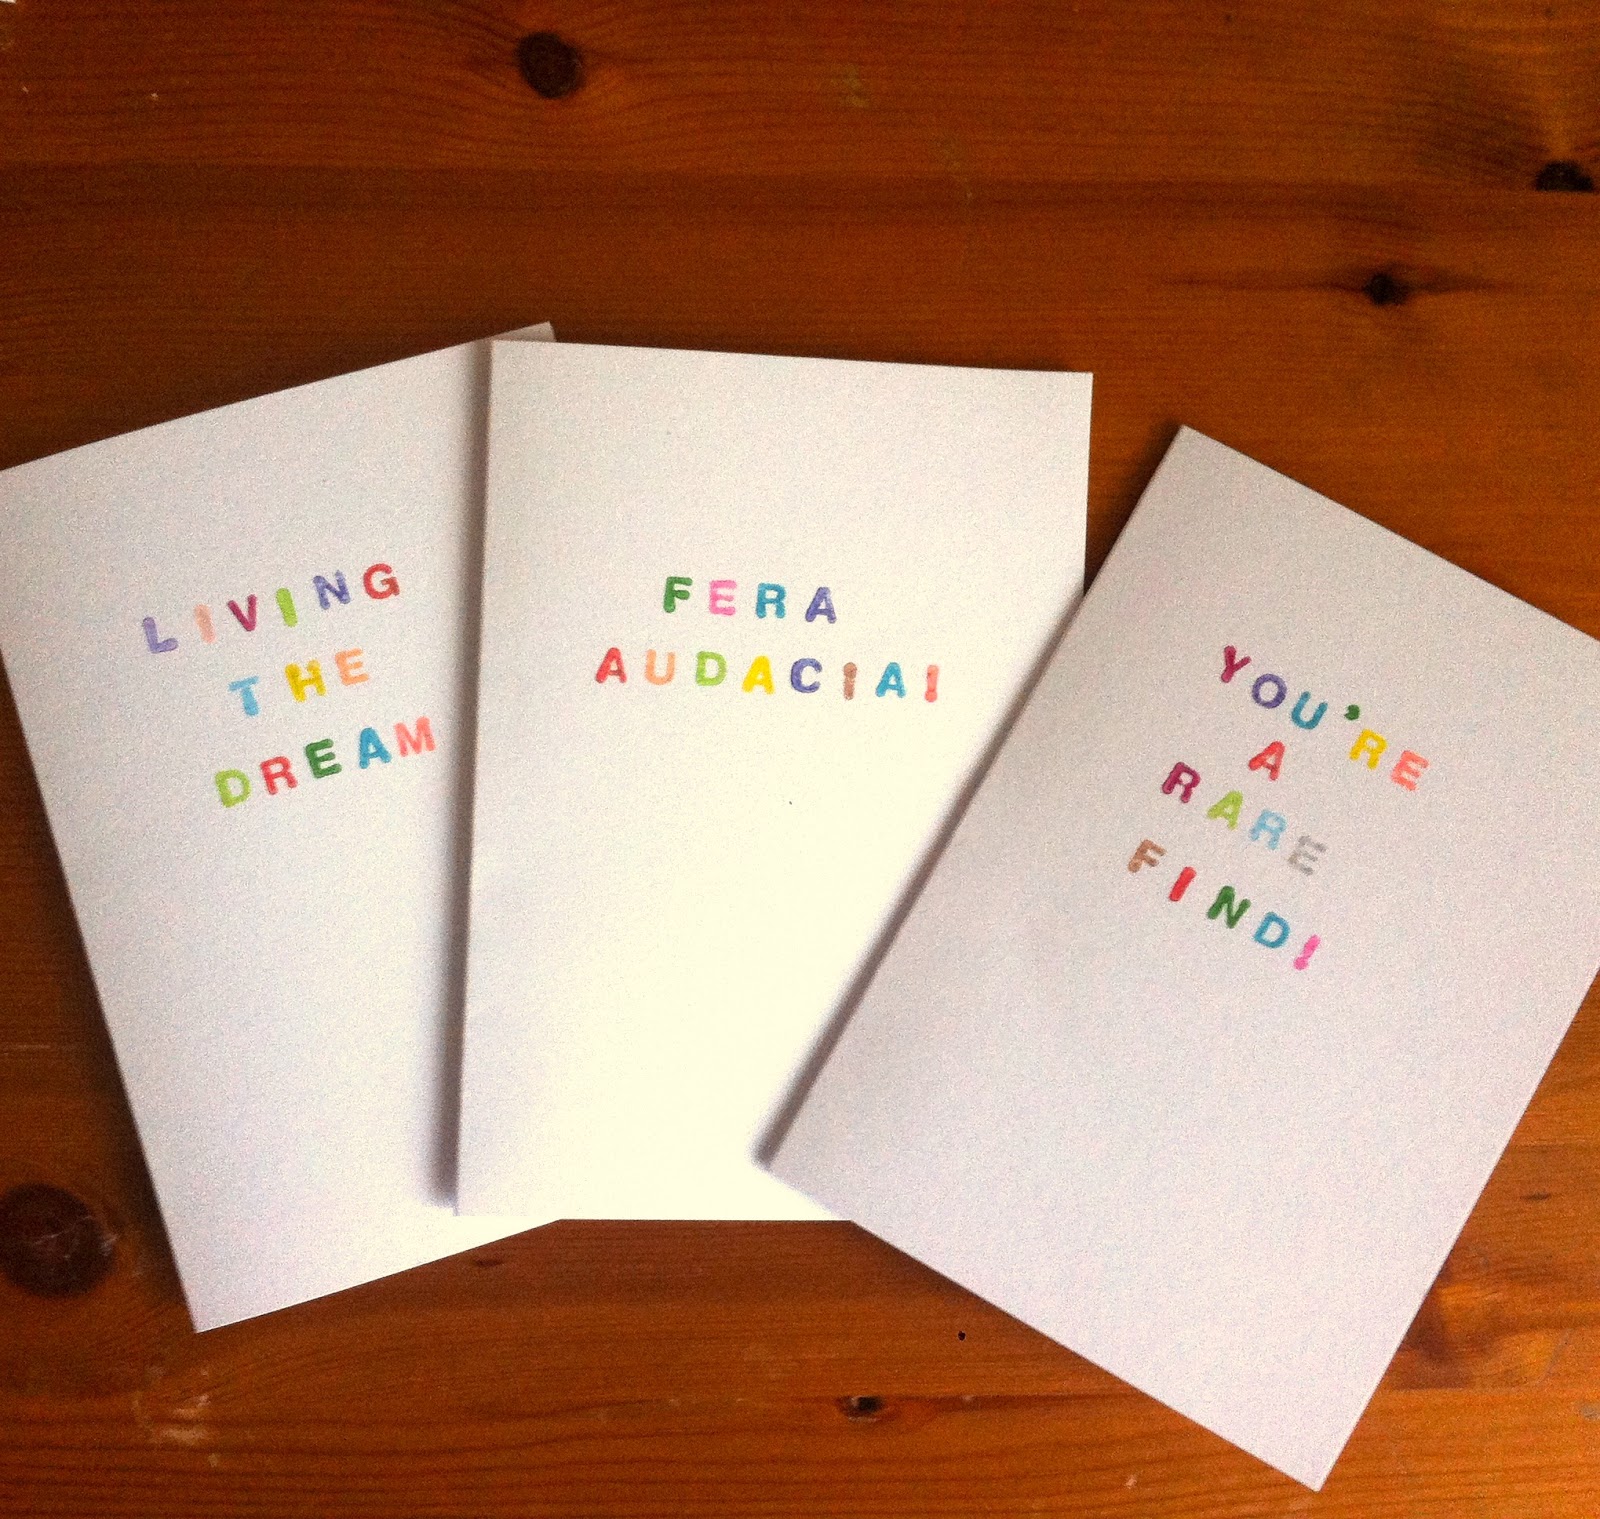
    Greetings cards in a hurry - rubber alphabet stamps


    I often find myself putting together greetings cards in a rush (Sorry, friends and loved ones). The following post shows an idea for a personal greetings card that is laughably simple and requires little to no artistic flair whatsoever - if you're intimidated by drawing or printmaking then this is for you. The end result is quirky, witty and really simple, but in so many cases the simplest ideas can be the most striking and effective.


    Materials:

    Rubber alphabet stamps (mine are from Muji)
    Ink pad (Hobbycraft)
    Blank cards
    Baby wipes/damp tissue


    The little extra something comes in the form of a multi coloured ink pad - I got this one at Hobbycraft. When I saw it I was immediately tempted by it, as I can never really be bothered with lots of different coloured pads, a bit too faffy for my liking. This is perfect and there is a nice little range of colours. The alphabet stamps were a present from friends several years back, but you can see they came from Muji and are still available in their shops now.


    TIP - buy a pair of cheap baby wipes and have one to hand to blot each stamp after you use it. This stops your colours from getting messed up. I got mine in Wilkinsons for under £1. Bless you Wilkinsons, saviour to cheapskate crafters everywhere!

    The real beauty in this method of card making is that the creativity and genius lies not in the technique, but the words you choose to put on the card. As well as the obvious 'Happy Birthday' etc, you can put someone's favourite quote from a film, a joke, a poem, a personalised greeting... the list goes on. All the cards you see here are completely personal to the people receiving them. These are cards for three special girlfriends who made my recent stay in London fantastic from start to finish. They're already through the postal system by the time this blog post goes out, so the surprise hasn't been ruined. ;-)

    I really like the personal touch, the splash of colour and the classy minimalism of these cards. The materials are easy to get hold of, will last for ages and can be used in so many different ways. This is also ideal for a craft group of any age. I think blokes would like this style of card too, what do you think?


    Monday, 4 February 2013

    Mini Puppet Theatre Craft


    As this blog goes along you’ll see I love all things miniature. I first made a mini puppet theatre for my friend back at university – the great thing about being on an arts course is you can make your friends bizarre presents like this for their birthday and they don’t mind.

    This craft is great to do with a child as it’s fairly easy, they can throw a lot of their personality into it and make it their own. In fact, this craft is basic, the nuts and bolts are shown here but the final design will be very much down to you and your ideas. If you run a craft group or youth group, it’s also ideal, as the necessary materials aren’t hard to get hold of. 


    You’ll need:
    A smallish cardboard box
    Scrap cardboard
    Scissors/craft knife
    Glue
    Cutting mat
    Paints
    Paintbrushes
    Lollipop sticks for puppets

    First, you need to cut a hole in the front of your theatre for the stage area. I found it easiest to work the cardboard box apart so it’s flat, and draw a square with a ruler. Cut out the hole with a craft knife or scissors. 


    Glue the box back together, and use masking tape to tape shut any flaps. The bottom of the theatre needs to be open for you to use your puppets, so cut these flaps off, or tape them inside the box to make the theatre more sturdy. If you want, cut out curtains from a piece of painted card, or fabric, and glue these behind the stage, making sure they don’t crowd the space for the puppets.


    If you’re feeling adventurous you can use scrap pieces of cardboard to give your theatre more structure. I cut castle battlements and a house shape for my theatres. The possibilities are endless – a rocket, a tower, an opera-house… or why not theme your theatre around a favourite film or TV show? Perhaps make puppets of your friends or family? Next time I do this I’m making a Tardis theatre with little Doctor Who puppets… 


    Next, paint your theatre. I used my trusty Plasti-kote craft paint, but acrylics or poster paint will work just as well. Again, this part is up to you and your imagination. If you’re stuck for inspiration, bright colours and simple patterns work well, or you could go for a Punch and Judy stripy effect.


    I’ve painted lollipop sticks for my puppets, but feel free to go one step further – you could make cardboard or fabric puppets and stick them on the lollipop sticks for a more 3-d effect. Or maybe you could cut pictures of people out of magazines and mount them on some card.


    That’s all there is to it really. Enjoy!

    Monday, 28 January 2013

    Upcycled chocolate tins


    Two chocolate tins were kicking around the office after Christmas, and I whisked them home to have a go at transforming them into pretty cake tins. I wanted to let loose with a spray can and these seemed like the perfect first project.


    The paint came from Wilkinsons, and cost about £3 per can. After each tin, I still have just under half a can left, so it was quite cheap.
    Interestingly, the Heroes tin (blue) took the paint really well, but the Quality Street tin was another matter, with the paint struggling to stick. Three coats later though, and I was pleased with the effect. The spraying took up a day, with about three or four coats applied.


    I faced the usual fun stuff when using aerosols – horrible fumes, motes of dust and tiny hairs deciding to stick to the wet paint, etc. I also had to be patient between coats, something I am terrible at. But at the end of day one, each tin was coated nicely. Success.

    The Quality Street tin had an embossed lid that I didn’t really want people to see, so I came up with the idea of giving it a padded fabric panel on top. I cut out a couple of pieces of octagonal cardboard and stuck them together to make a sturdy base, then simply stretched a piece of scrap fabric over some wadding and stapled it all secure. Loads of strong glue and a heap of heavy books on top overnight secured it nicely. When it was dry, I ran the glue round the edge and glittered it up to hide where it meets the tin.


    Next came the risky part – I bought potted paint and decided to try hand-painting the tins. I didn’t want the tins to finish up looking too polished, or mass produced, and a hand painted look would give the tins the folk-art look I wanted. But sometimes something can look great in your head and turn out, well, rubbish. But I bit the bullet and went ahead.


    It paid off! The potted paints don’t smell or give off nasty fumes like the spray cans. They mix beautifully and the consistency is perfect, I had no problems with dripping or anything like that. The closest thing I can compare it to is using acrylic paint, though obviously this is a more permanent medium, and with a smoother finish. They’re also water based, so no need for horrible paint thinners to clean your brushes. It goes on like a dream and you can go into fine detail no problem. It also dries fast. Cue shouts of hooray from impatient people everywhere. 


    I painted the green tin’s fairly basic patterns first, and it went so well I was emboldened to try something more complicated for the blue tin. I wanted something that was illustrator-y and slightly unconventional, so I came up with a portrait illustration for the lid, and little cake illustrations for the sides.

    So, at the end, I’d probably give this revamp job 7 out of ten. I’m pleased with the end result, and the paints are really good. I learnt some lessons for next time - I’d probably mask off the top of the tins where the lid goes, as I suspect repeated use will wear the paint away there. The fabric cover on the green looks alright, but now I don’t think I’d use this tin for food storage as washing up would be tricky. But overall it’s been fun and I loved painting the little pictures and patterns. If other people have tried similar projects I’d love to hear your feedback.


    Tuesday, 22 January 2013

    A fixer-upper


    I just thought I'd share this finished project with you all: I found this dollhouse shelving unit at Peterborough Market back in November. It was pretty filthy, home to some deceased spiders, and with flaking pink paint. After hauling it home on the bus in the pouring rain, I gave it a good wash, and got out some sample pots. Here it is, all clean and re-decorated. I've put some of my little things on the shelves, and I'm really pleased with it! I just wish I knew who made it, or where it came from.

    The postcards I feel should get a mention, they were freebies in a zine I bought off Etsy last year. The illustrator is Kristyna Baczynski, and I'm a huge fan. I got the giant button from a fair I went to years ago. I love collecting oversized and miniature objects, as you can see from the shelf of tiny books. The photograph was a little freebie I got with a larger photo, from Silent Theatre. Finally, the lion is a carving my grandfather bought when he lived in Hong Kong in the fifties. The teeth and claws are ivory, so I doubt you could buy something like that now, not legally anyway.


    I'd love my own dollhouse, this is the next best thing I suppose!